War wraps, Diapers, & Duct Tape
| July 9, 2017 | Posted by Melinda under Vet & Sports Medicine |
The instructions were to wrap Farley in a ball (or “bell”) bandage every couple of days for three weeks to protect and support the tissue of her heel while it was squishy and oozy.
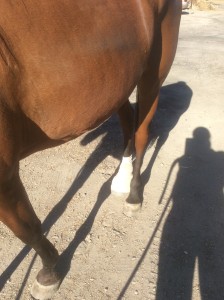
Bandage placed by my vet post procedure. A very nice and traditional bell bandage.
There’s variation on any bandage (welcome to the grey areas of medicine), but in general for a ball bandage going on the foot you have the following layers:
- Layer that goes next to the foot that will differ depending on what specific thing you are treating
- Fluffy padding layer
- Layer that will compress the fluffy layer down to something manageable.
- Protective outer layers from water and wear like duct tape, vetwrap, and elasticon.
Necessity being the master of invention I’ve come up with Mel’s version of the ball bandage that minimizes the swearing that takes place when I have to change it out. If you are already familiar with the principles of bandaging maybe this will give you some ideas. If you aren’t….well, lucky you and you get to find out what how to use sugar, old war bandages, diapers, and duct tape in a bandage!
The fun layer: Diaper with sugar and betadine, antibiotic ointment on a pad, stretchy white gauze
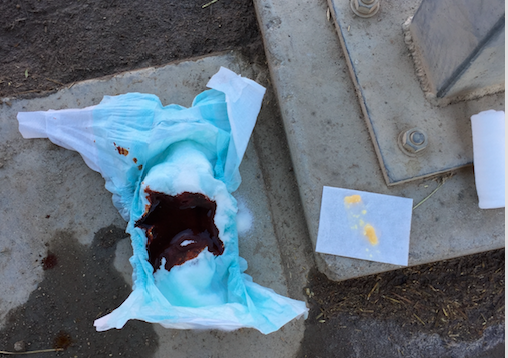
Apparently size 2 diapers work really well, but I probably have a kid in a size 6 diaper so why buy extra?
Of course, remembering to grab extra diapers for the barn seems to be problematic. Fortunately there’s a diaper factory running around the barn *somewhere*. It might even be clean (the diaper, not the child). Snatch the very-clean-just-changed diaper off the child and use it on the hoof, or go *all* the way home to get another one?
Now I just need to come up with a plausible explanation for the husband of how the kid randomly lost the diaper and is sitting in the carseat naked.
I digress.
A teflon pad (or feminine pad) with antibiotic ointment is placed over wound. Stretchy white gauze is rolled on top. It’s not tight – just holding everything in place. There’s a lot of acceptable variation of how a bandage can be placed. However there are things that are OK to go directly on the skin, and things that are not. I highly recommend you don’t use vet wrap. I’ve seen so many awful problems. This stretchy white gauze is really good at holding stuff into place without constricting, cutting the skin, or rolling.
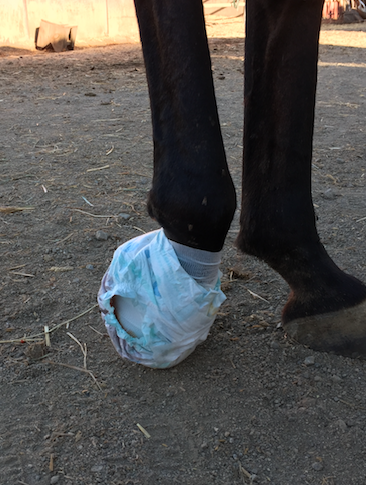
Diaper with sugar-dine solution against the bottom of the hoof is secured around the hoof.
Next layer – vet wrap
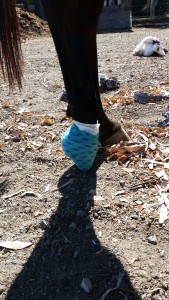
Now you get to use that roll of vet wrap you’ve been holding in your kit for a million years, assuming it hasn’t congealed into a solid un-useable mass. It isn’t the most versatile piece of bandaging material and has a lot of draw backs, but I guess anything that comes in funky colors and designs is good marketing.
Notice how the vet wrap is placed so it doesn’t contact the skin? The diaper forms a border and is peeking out of the vet wrap.
It’s time for the war bandages
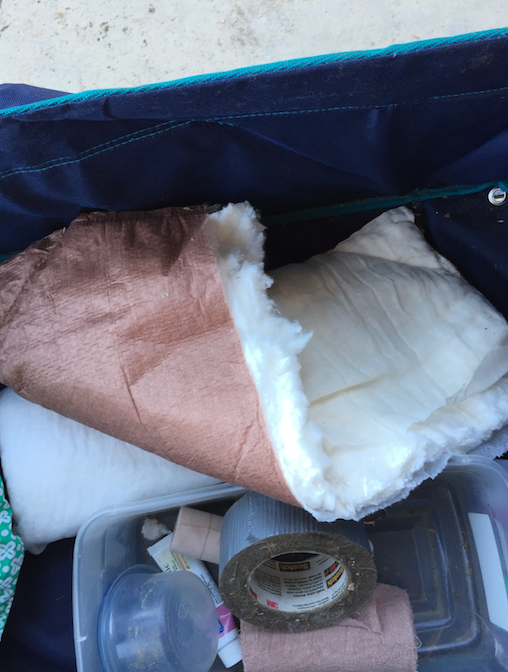
Technically I should be using fluffy white “combi” bandages that when wrapped around the hoof have just enough length to be folded under the hoof and form a nice pad, as well as lots of layers that will take forever to wear through.
In reality I can never get it wrapped correctly, it only folds under part way and makes some sort of funky angle that Farley looks at in disgust. I’ll try to compress it down with the next layer – brown gauze – and it just looks awful, isn’t functional….AND because I’m doing this at o’dark thirty after a long day I just don’t have the patience.
So, my hack is to use these 1955 “war bandages”. They are multiple layers thick and come with 2 rolls of brown gauze. I cut them in half and get two bandages out of them. They wrap around the foot and end at the toe.
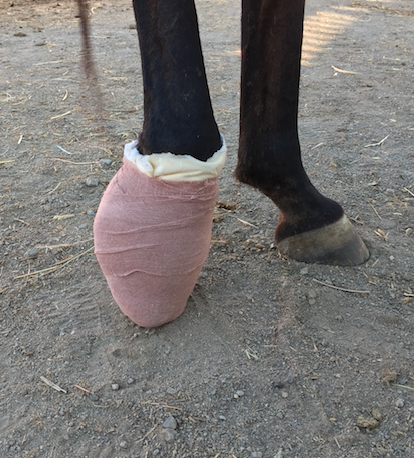
A roll of brown gauze is used to compress the bandage into something vaguely hoof-shaped.
Again, notice how the brown gauze doesn’t wrap against the skin. You can see a border of the white fluffy layer peeking out.
Duct Tape
No hoof bandage would be complete without duct tape.
For the bottom of the foot I make a reinforced mat of duct tape. Here’s the pattern I believe gives me the longest wear.
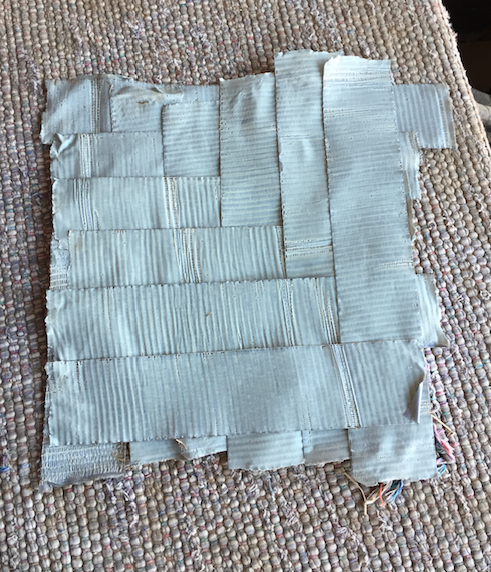 I place the mat on the bottom of the foot, place more wraps of duct tape up the sides of the bandage so that none of the brown gauze is visible. HOWEVER, the duct tape is NOT placed directly against the skin.
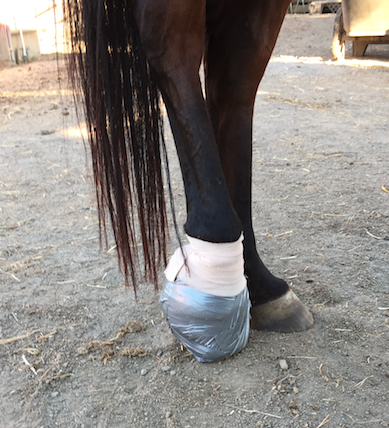 I finish the bandage with a couple wraps of Elasticon. It’s important to not get it too tight. The property of Elasticon that is being exploited is how sticky it is and how well it will stick to the hair/skin AND how tolerant of movement it is. It seals the top of the bandage so dirt doesn’t get in and helps the bandage stay in place by connecting it to the skin. Elasticon is EXPENSIVE, so I tend to use it only on the part of the bandage where I need it’s unique properties. I could have finished the entire bandage with a layer of Elasticon all the way to the ground (which is what my vet did in the first picture). However, duct tape will do a “good enough” job in that area, so I just use a couple of wraps as seen in the picture above.
Final Notes
The secret to bandaging success is knowing the purpose of each layer and being familiar with the pros and cons of each bandaging material. If you know these things, than you know the answer to questions like “can I use x in place of y?” or “can I do a instead of b?”.
In general the 2 mistakes I see in bandages are:
- putting the layers on that should be loose too tight and vice versa
- Using the wrong material next to the skin.
Some general guidelines…..
- Do NOT use vetwrap or brown gauze or duct tape directly against the skin.
- The white stretchy gauze is not tight.
- The vet wrap is “firmly” wrapped and it’s main purpose is to hold the underlying bandages in place.
- The fluffy layer provides protection, comfort, and stability (in conjunction with the brown gauze compressing it). You can’t get it too tight because it will just tear.
- The brown gauze is the main compression layer and is tight. The bandage should sound solid to a “finger flick” after it’s done. THIS IS YOUR TIGHTEST LAYER.
- The duct tape is firmly wrapped so it is not loose. It’s purpose is to waterproof the bandage, help keep it clean, and to help keep the bandage from wearing through on the bottom too fast.
- The elasticon is NOT tight and should be “stretched” prior to use – unrolled and then re-rolled onto the roll – so that it doesn’t get applied too tight.
Wrapping a leg or another area isn’t identical to what I describe in this post, but many of the layers and concepts are the same. (what goes against skin, which are the tightest layers, etc.)
Can I reuse bandaging material?
Maybe.
I find that the materials stay cleaner if I’m wrapping a leg and most of the time I can reuse material if I’m wrapping a leg. The hoof bandaging material is pretty thrashed after 3 days when it’s time for a bandaging change.
I did find a velcro “hoof boot” bandage on valley vet that I ordered this week – of course just in time to almost be done with the process of bandaging Farley’s hoof. However, for 18 bucks it will pay for itself if I can apply a lighter bandage with less layers for the next couple bandage changes. I haven’t gotten it yet (will update when I do), but I think I would probably apply the boot over the teflonpad+whitegauze+diaper+vetwrap layer. Which would be a LOT easier, AND not doing all the outer layers would allow the boot to pay for itself in 2 bandage changes.
Bandaging is a pain in the ass, but you will make your life easier if you use the proper materials (including any substitutions) and use those materials in the right way. The goals at the end of the day is a bandage that does not further damage the horse, fulfills it’s function, and stays on. 🙂


